¿Creamos juntos? Hoy les tengo una nueva propuesta para esos recuerdos especiales que tenemos con nuestras amigas/os del alma. Vamos a hacer un precioso layout usando la colección «Bayfair» by Rosie’s Studio junto a Spellbinders. Y para esta idea nada mejor que pensar en trabajar con capas y texturas ¡manos a la obra!
Shall we create together? Today, I have a new proposal for those special memories we have with our dear friends. Let’s create a beautiful layout using the ‘Bayfair’ collection by Rosie’s Studio along with Spellbinders. TAnd for this idea, nothing better than working with layers and textures. Let’s get started!»
*** Lista de completa de productos / Complete Product list – AQUI/HERE ***
Base del Layout / Layout Base:
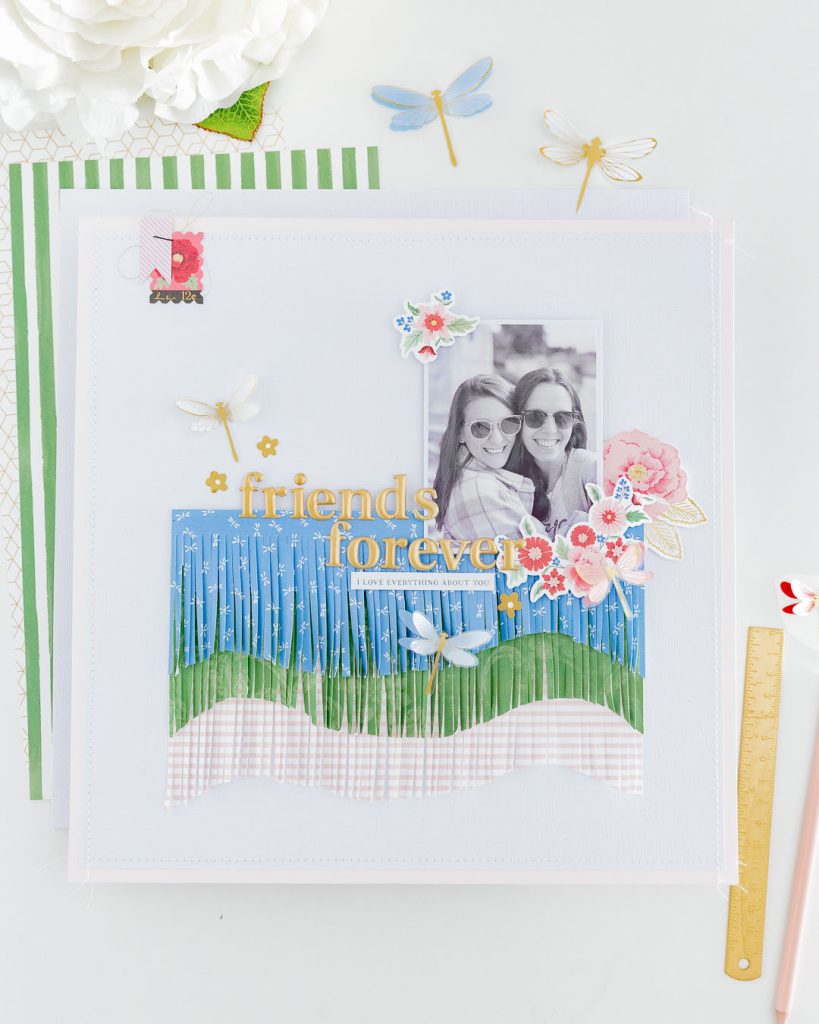
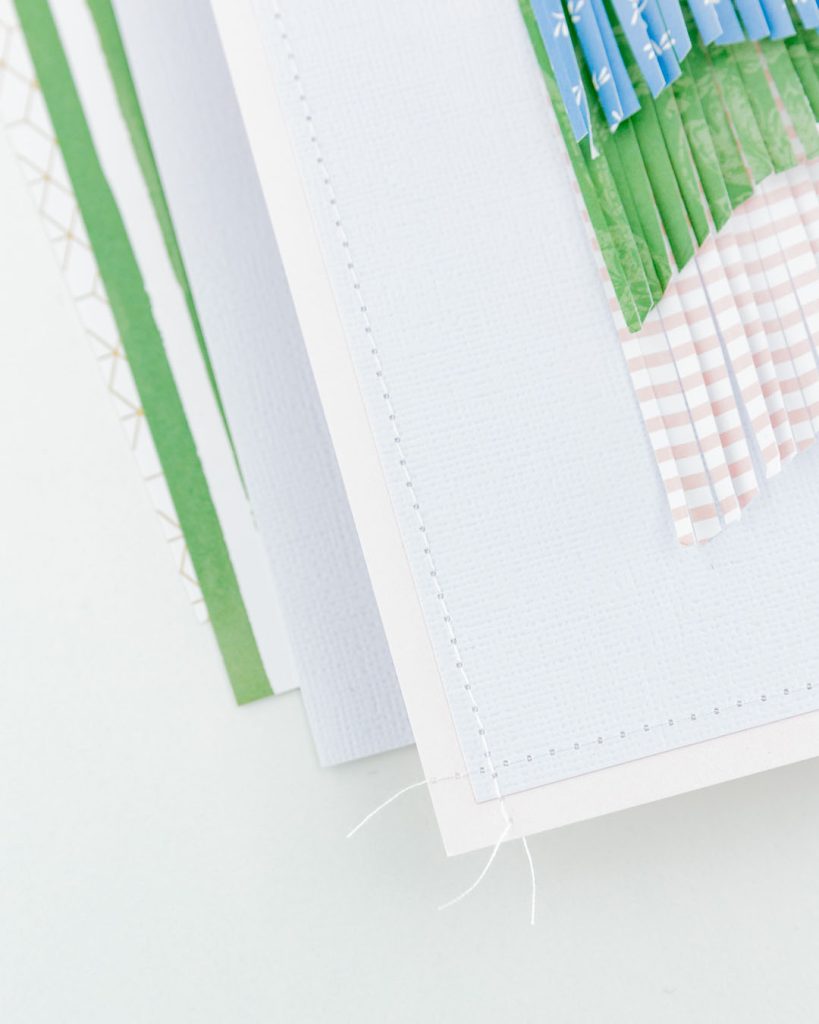
Para la base utilicé un papel de color rosa palo y un cardstock blanco texturizado. Quita 1/2″ al ancho y alto total de la hoja de cardstock blanco y pégala sobre la hoja de papel de color rosa. Puedes añadir un detalle de costura alrededor e, incluso, pegar el cardstock blanco con foam adhesivo para dar relieve.
For the base, I used a light pink paper and textured white cardstock. Trim 1/2″ from the total width and height of the white cardstock sheet and adhere it to the pink paper. You can add a stitching detail around it and even use foam adhesive to add dimension to the white cardstock..
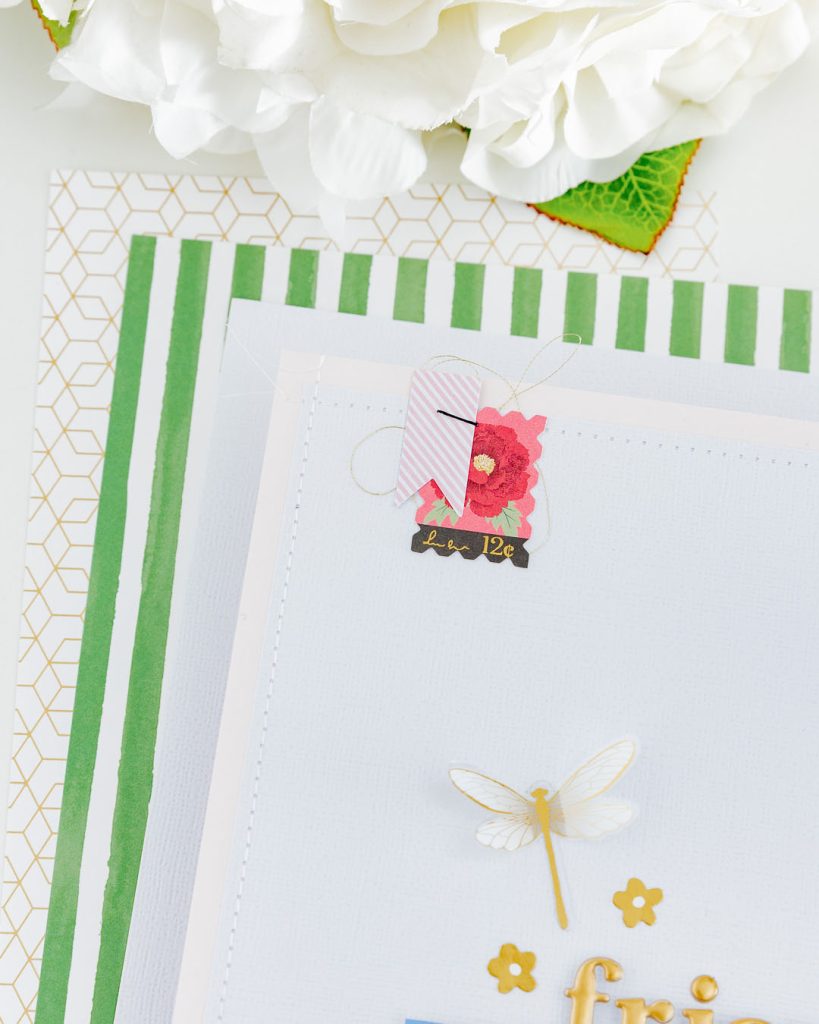
Detalles decorativos / Decorative details:
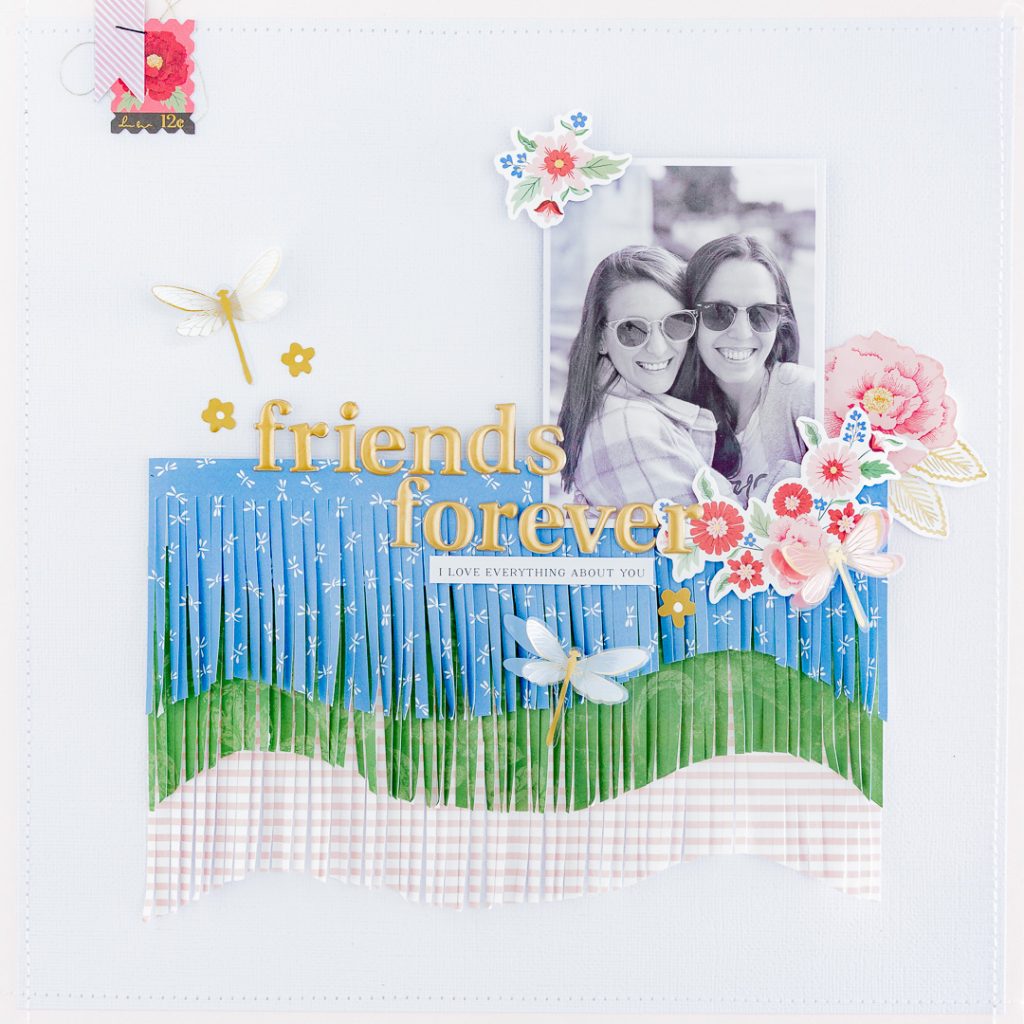
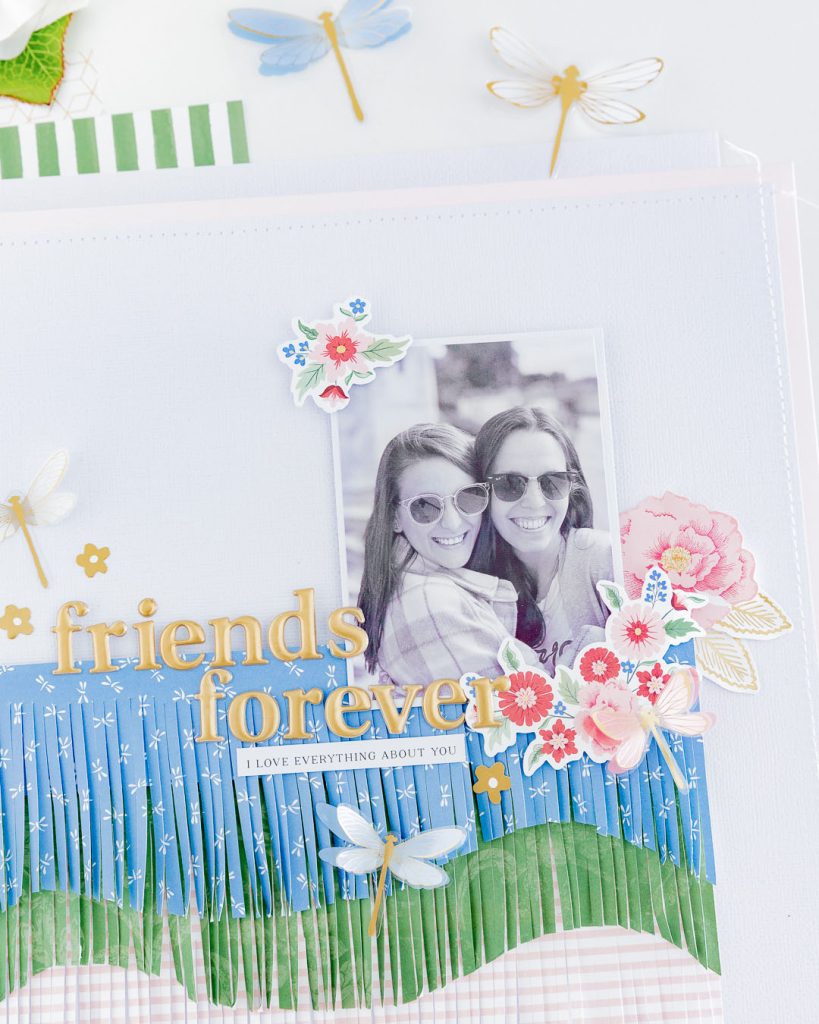
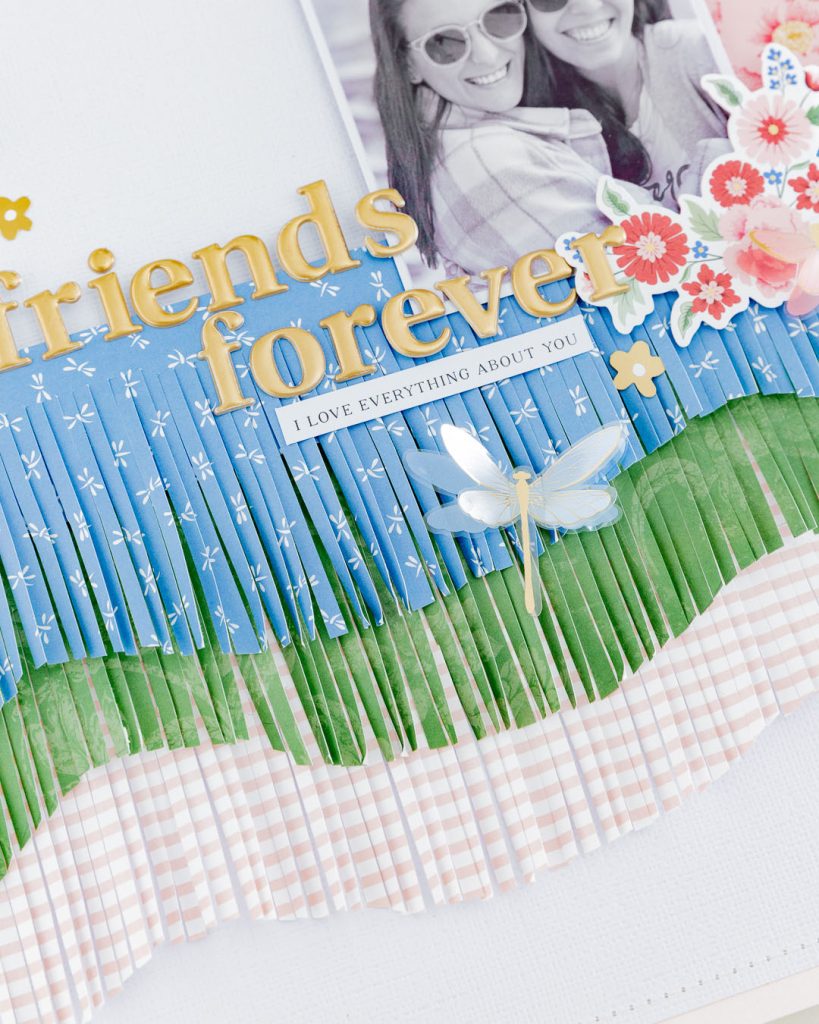
Para preparar este layout utilicé los distintos papeles del pack de 12×12 para hacer tiras de «flecos» usando mis tijeras para ello. Primero escogemos la combinación y ubicación que le daremos a cada papel y luego cortamos los flecos. Las medidas que he usado son: 8 1/2″ de ancho x 3″ de alto. Cuando ya tenemos todas las piezas, podemos presentarlas en la base del layout y cortarles el borde en forma para que se vea como una cascada.
To prepare this layout, I used various papers from the 12×12 pack to create ‘fringe’ strips using my scissors. First, we choose the combination and placement for each paper, then cut the fringes. The measurements I used are: 8 1/2″ wide x 3″ high. Once we have all the pieces, we can arrange them on the layout base and trim the edges to create a cascading effect.
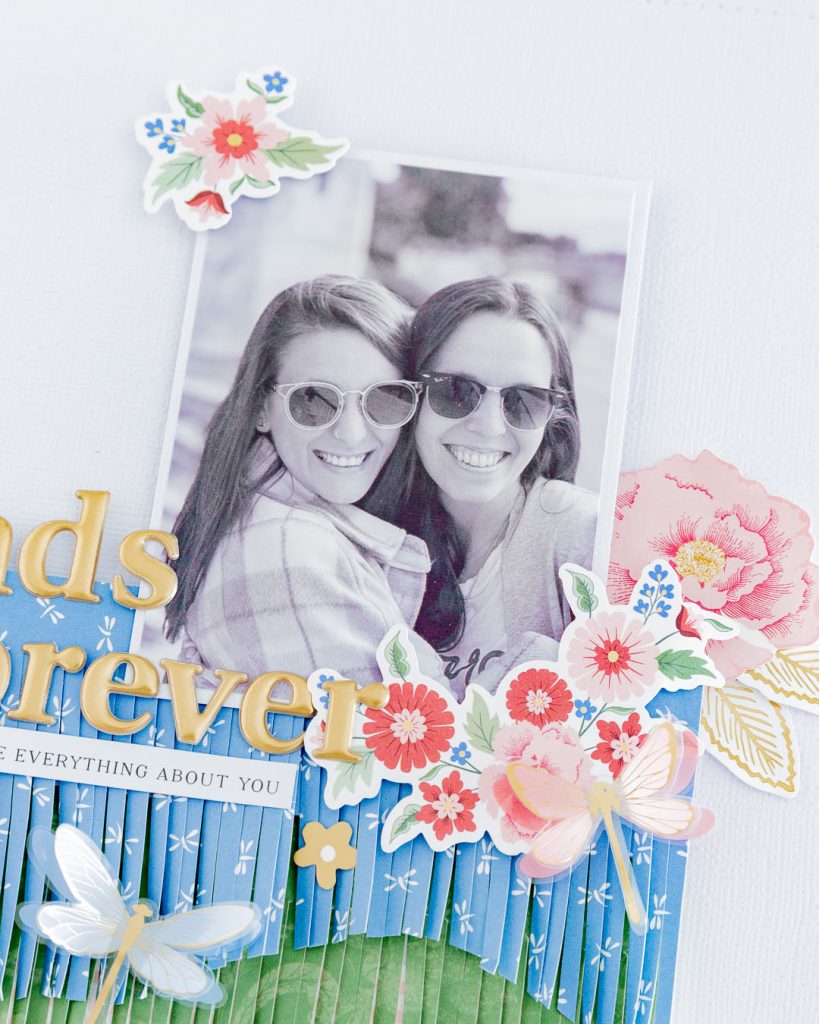
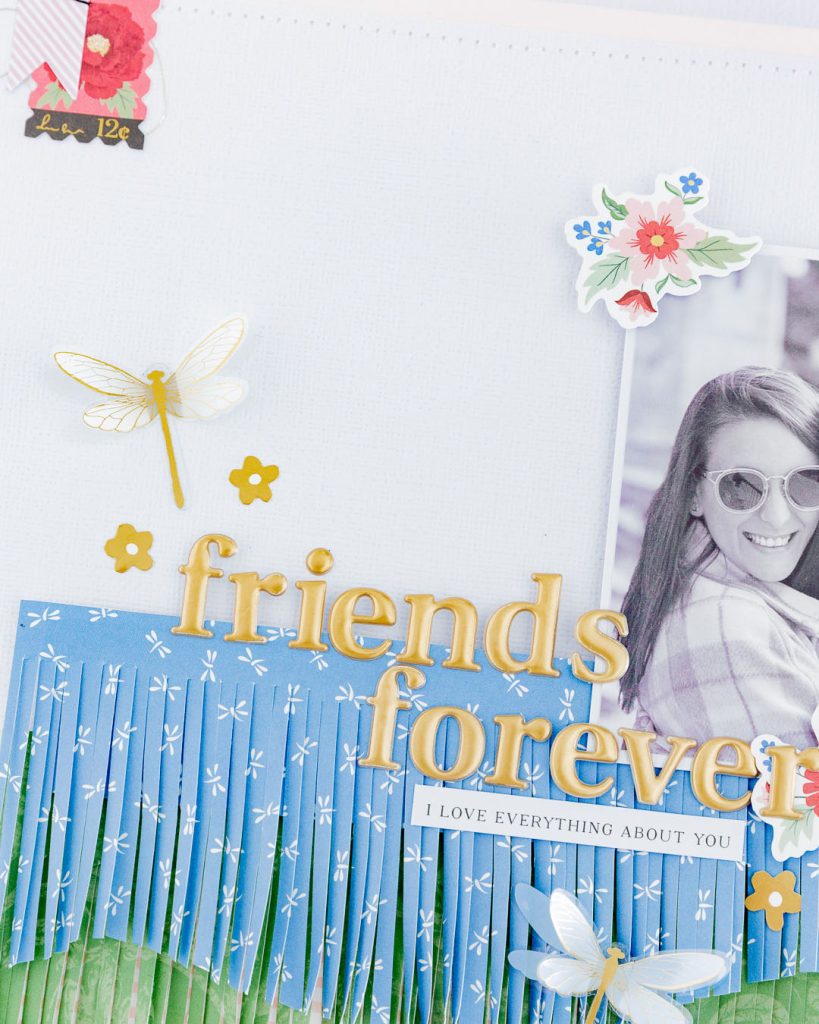
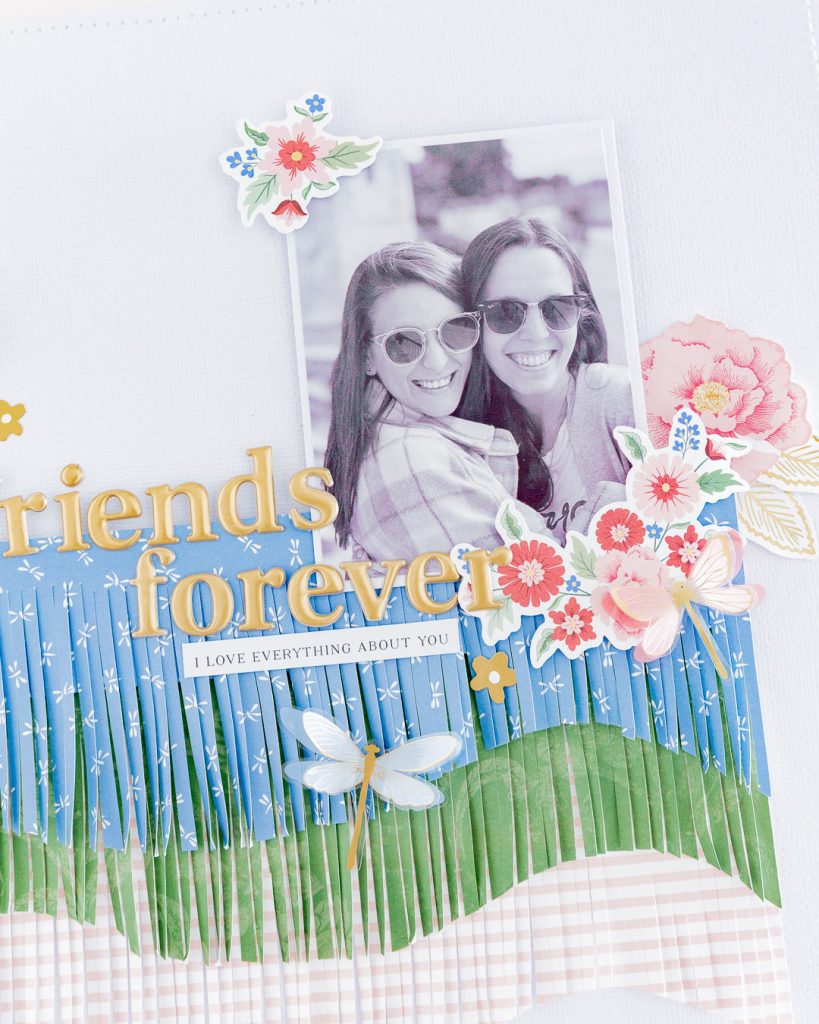
He pegado las tiras de papel de abajo hacia arriba con adhesivo, excepto por la última (primera a la visual) que la he pegado con foam adhesivo para dar relieve. La foto que he añadido es de 3″ de ancho x 4″ de alto (previamente pegada a una base de cardstock blanco). He combinado elementos del flores del ephemera pack + cardstock stickers. También añadí un título con el alfabeto puffy.
I have adhered the paper strips from bottom to top with adhesive, except for the last (first visually), which I adhered with foam adhesive for dimension. The photo I added measures 3″ wide x 4″ high (previously mounted on a white cardstock base). I combined elements from the ephemera pack and cardstock stickers. I also added a title using puffy alphabet stickers.
Detalles especiales / Special details:
Hay dos detalles especiales en esta composición. Ellos son: decoración en la esquina superior izquierda en composición con hilo dorado y grapadora y, la segunda son los stickers de libélulas con alas en relieve. El hilo dorado da un bellísimo detalle de terminación y a la vez de textura en el detalle visual añadido. Las libélulas (que son stickers dimensionales) dan un precioso detalle de volúmen y movimiento. Es importante plegar hacia arriba sus alas.
There are two special details in this composition. The first is decoration in the top left corner using gold thread and a stapler. The second is the dragonfly stickers with layered wings. The gold thread adds a beautiful finishing touch and texture to the visual detail. The dragonflies (which are dimensional stickers) provide a lovely sense of volume and movement. It’s important to fold their wings upwards.
Amo cómo se ven todos los detalles y lo especial que hace que la foto se vea. Es el recuerdo de un momento maravilloso al que le he podido dar vida con esta idea 😉
I love how all the details look and how they make the photo stand out. It’s the memory of a wonderful moment that I’ve been able to bring to life with this idea 😉
Espero que esta idea haya súper inspiradora y que te animes a hacer tu propia versión la maravillosa colección Bayfair ¡Gracias por estar aquí!
I hope this idea has been super inspiring and that you feel encouraged to create your own version with the wonderful Bayfair collection. Thank you for being here!
Los enlaces de afiliados se aplican sin costo adicional para ti. ¡Gracias por tu apoyo!
Affiliate links apply at no extra cost to you. Thanks for your support!


 17.11.36")